
In Magento 2, Attributes means the property/characteristic of a product, useful for the function of the e-commerce website. Attributes can be used as search parameters and product comparisons. The set or group of these properties is known as the Attributes set. In order to divide the different products into groups, every product must be associated with a respective attribute set.
For a better understanding of the above, let’s take an example
A shirt can be described by a large no. of attributes like size, color, fabric, style, pattern, etc. The set of all these characteristics is known as an attribute set and each individual characteristic is an attribute.
To provide a better shopping experience to the customers, it is good to create more properties and allow the customers to filter their required products from a wide range of inventory.
In this document, we will show and explain to you how to create Magento 2 Attributes.
The process to create Magento 2 Attributes
Magento 2 allows you to create as many attributes as required, which means you can create unlimited no. of product attributes. Isn’t that great?
Below is the list of attributes which are inbuilt in Magento 2 Web Development and cannot be deleted:
- Status
- Name
- Sku
- Sku type
- Price type
- Price
- Tax class
- Quantity and stock status
- Weight
- Weight type
- Category
- visibility
Also Read: Why Opt For Magento 2 For E-Commerce Development In 2019?
This variety of product attributes allows the users to narrow their search criteria and experience better shopping experience. The process to create Magento 2 attributes consists of three steps.
- Complete Basic and Advances Properties Information.
- Manage labels.
- Describe Storefront properties.
Basic and Advanced Properties Information
- On Magento 2 Admin Panel, click on ‘Stores’. From the attribute section, select the product.
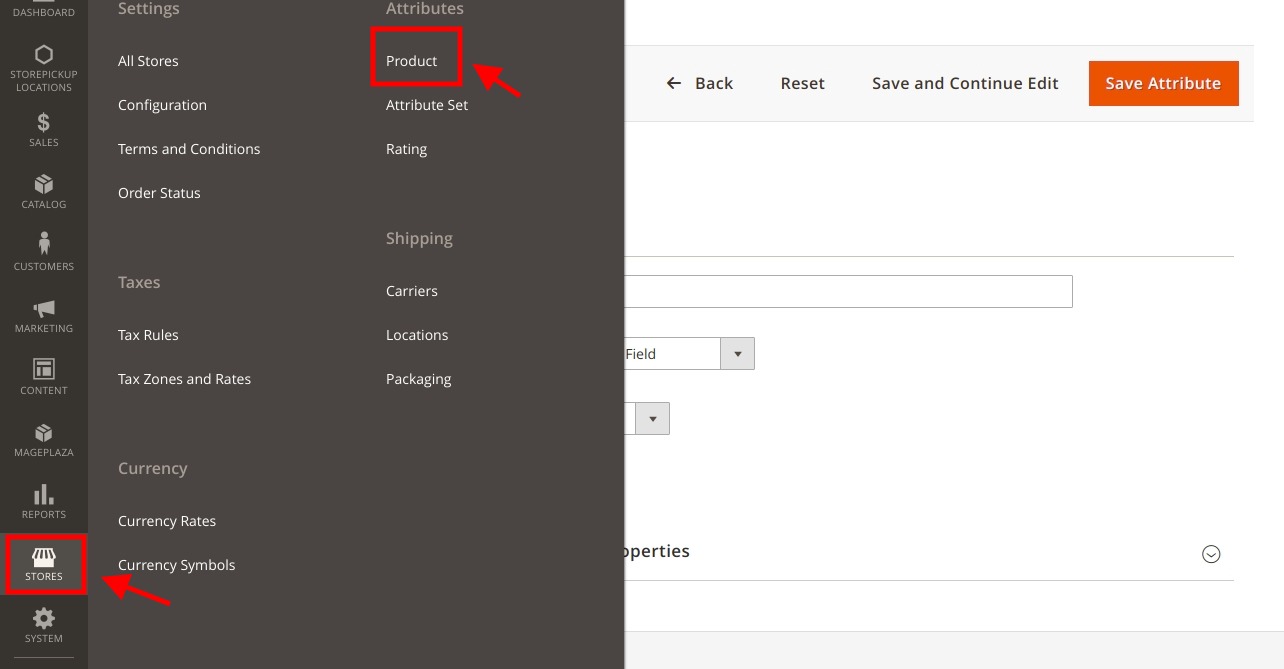
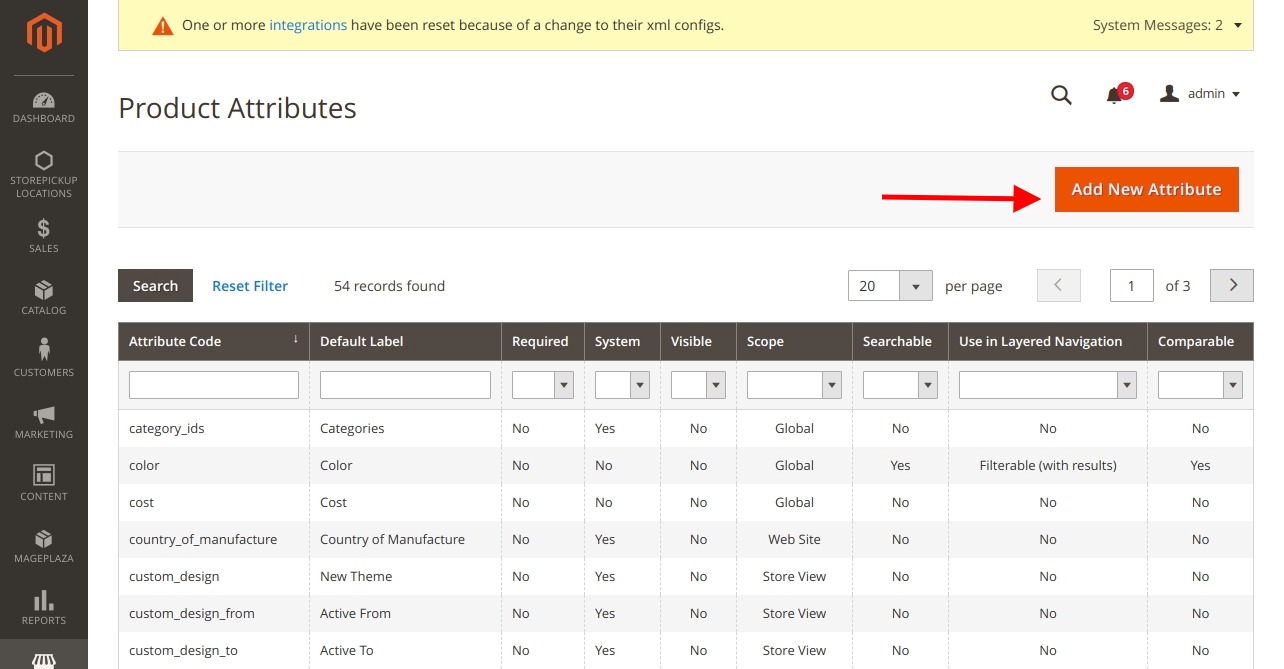
- Click on the ‘Add New Attribute’ button.
- In the attribute properties section, complete the below fields:
- Default Label: Enter the default label to identify the attribute.
- Catalog Input Type for Store Owner: Choose the data type and input control used for data entry and manage the product from the store Admin. Below is the list of available options:
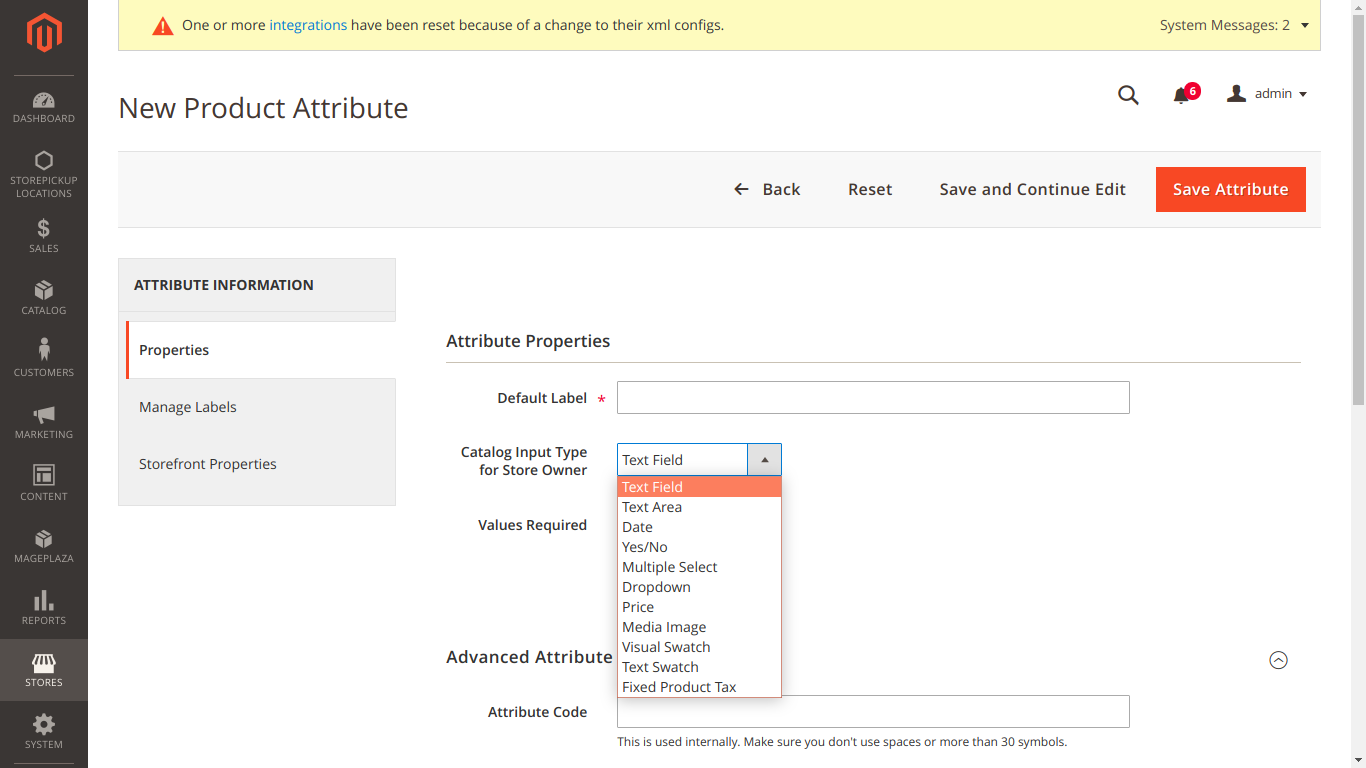
- Text Field: Used to write a short description.
- Text Area: Used to write long descriptions.
- Date: Type date directly from the field or select from the calendar
- Yes/No: Drop-down list with predefined options – ‘Yes’ or ‘No’
- Multiple Select: Allows multiple selections from the drop-down list.
- Dropdown: Allows one only selection from the list of options
- Price: Special price, the total price can be mentioned here.
- Media Image: Allows to add an additional image in the attribute set of a product.
- Fix Product Tax: Allows to define FPT rates.
- Visual Swatch: Displays the color, pattern, and texture of a configurable product.
- Text Swatch: A text-based demonstration of a configurable product option, generally used for size
Recommended: How To Add Product Video In Magento 2?
NOTE: If you select ‘multiple select’ from ‘Catalog Input type for Store Owners ‘option, follow the below steps:
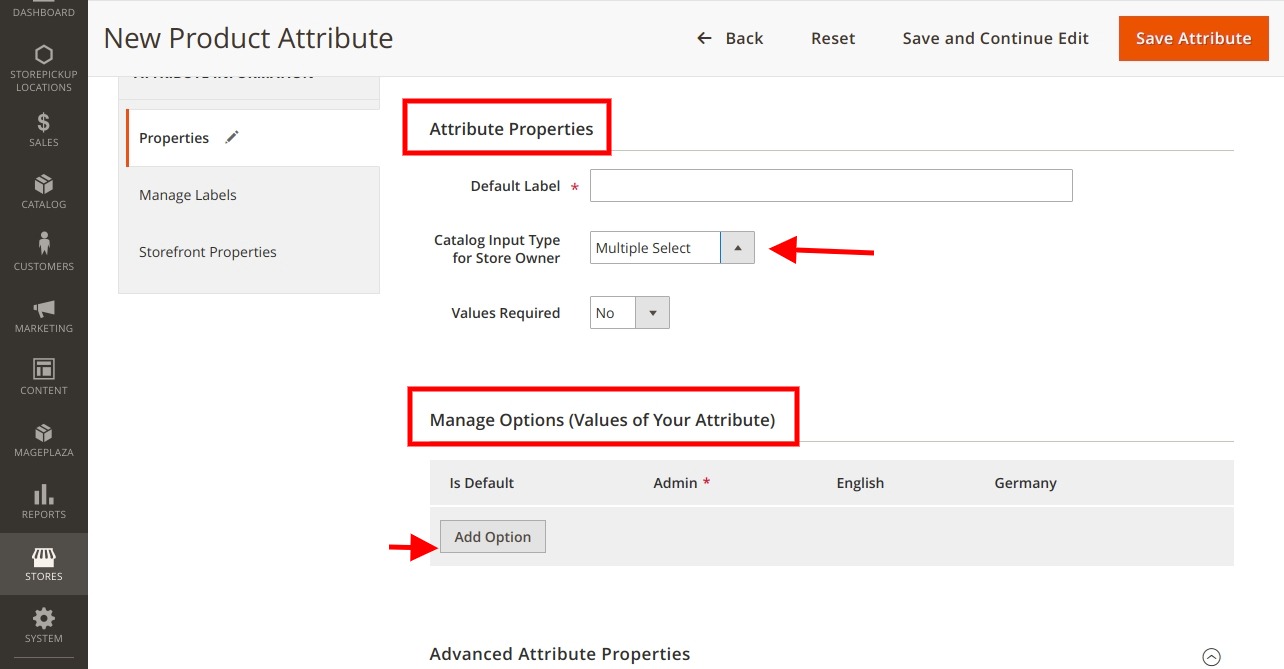
- From the ‘Manage Options’ section, click the ‘Add option’ button.
- Select ‘Default’ to choose the option as the default value.
- For the one-store view, enter only the Admin value and the same will be used for the storefront.
- For multi-store views, enter one value for the admin and different value for each store view.
- Click ‘Add Option’ to create multi options to be added in the list.
- In the ‘Values Required’ section, select ‘yes’, if you want to offer the option to the customer to choose an option prior to purchase a product.
Advanced Attribute Properties

In this section, complete the following fields:
- Attribute Code: Enter unique attribute code, in lowercase characters without spaces.
- Scope: Select one from the below options:
- Website
- Store View
- Global
- Unique Value: Select ‘Yes’ to prevent duplicate values. Select ‘No’ to provide different values to each product.
- Input validation from Store Owner: E-mail URL, decimal no, letters, alphanumeric values, etc. can be used to validate the data. This is used to validate the data provided by the store owner when the product is saved.
- Add to Column Option: Select ‘Yes’ to add this attribute to the list of column options in the product grid.
- Use in Filter option: Select ‘Yes’ to add this attribute to the list of filter options.
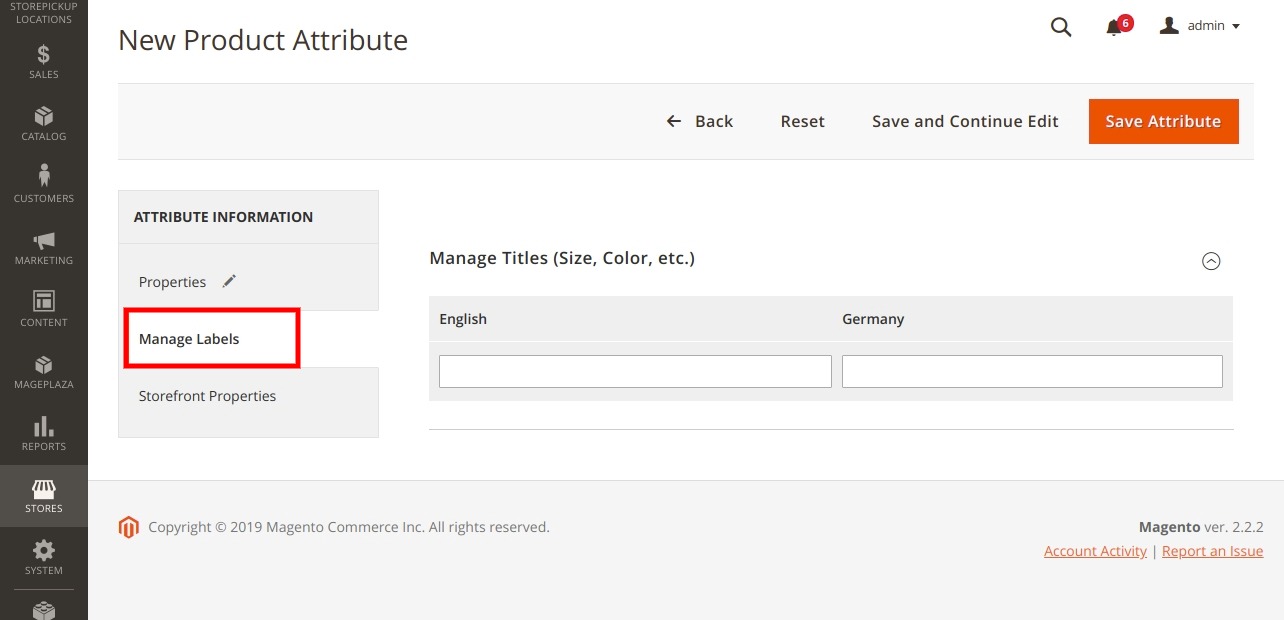
Manage Labels
Under the manage label section, enter the name of the attribute to be displayed on the store’s front-end. If the e-commerce website is available in different languages, enter a different translated title for each language.
Storefront Properties
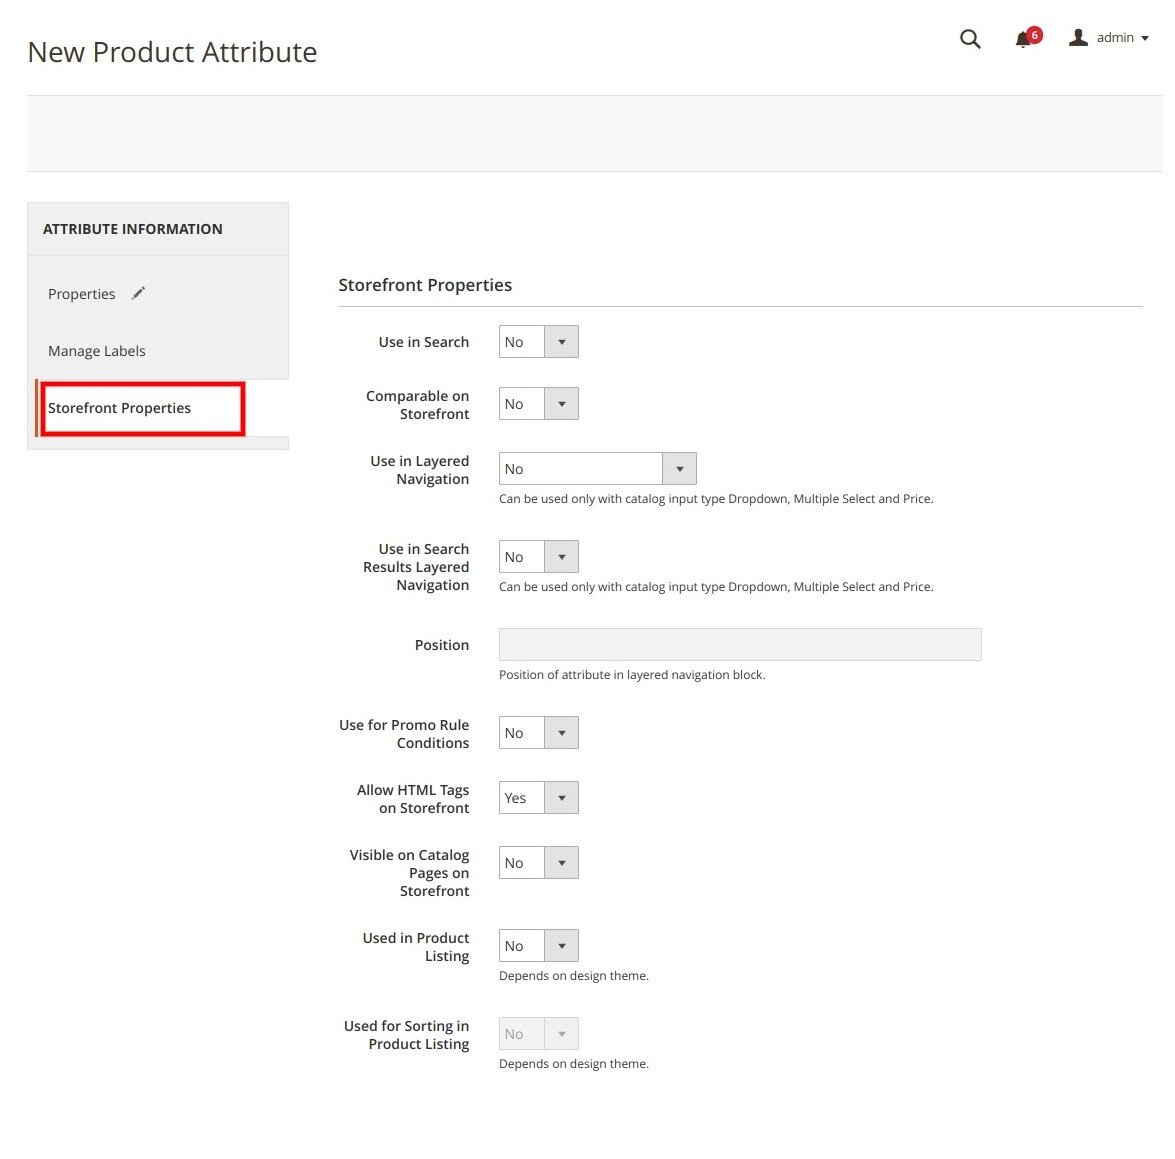
The storefront properties govern how an attribute’s appearance and behavior can be used in the e-commerce store.
Go to Storefront Properties Section and complete the below settings:

- Use in Search: Select ‘Yes’, if the data saved of that particular attribute is ready for quick and advanced search.
- Comparable on Storefront: Select yes, if you want to display this attribute in the product comparison list.
- Use in layered navigation: Select yes if you want to use this attribute as a filter option in layered navigation.
- Use in Search Results layered navigation:
- Position: Enter the no. to demonstrate the position of the attribute in the layered navigation menu.
- Use for promo rules Condition: Select Yes to set this attribute in price rules.
- Allow HTML Tags on Storefront: Select Yes to enable the text to be formatted in HTML.
- Visible on Catalog Pages on Storefront: SELECT yes to display this attribute in the catalog page listing.
- Used in Product listing: Select yes to add the attribute in the product listing.
- Used for Sorting in Product Listing: Select Yes to use this attribute in a sort parameter of the product listing.
Finally, after completing all the fields, click on the ‘Save attribute’ button.
Hello – Thank you for this easy to follow guide.
I always look for great Magento guides and found your tutorial useful.
KUDOS to your guide!