Learn to build your online store with Shopify.
Shopify is the most trending e-commerce platform. You can build your own Shopify store hassle-free. Like other eCommerce platform solutions, Shopify doesn’t take hours or days to begin with an online business.
Following the steps mentioned below, you can easily create your own Shopify store. So, let’s begin with this amazing Shopify Website Development tutorial.
Pre-requisites:
- Laptop
- Internet Connection
1. Sign up for Shopify
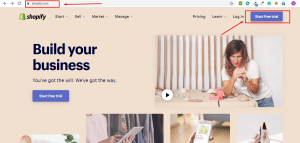
Navigate www.shopify.com. Click on Start Free Trial, to begin with, the 14-day free trial. (What could be best than a half month free trial).
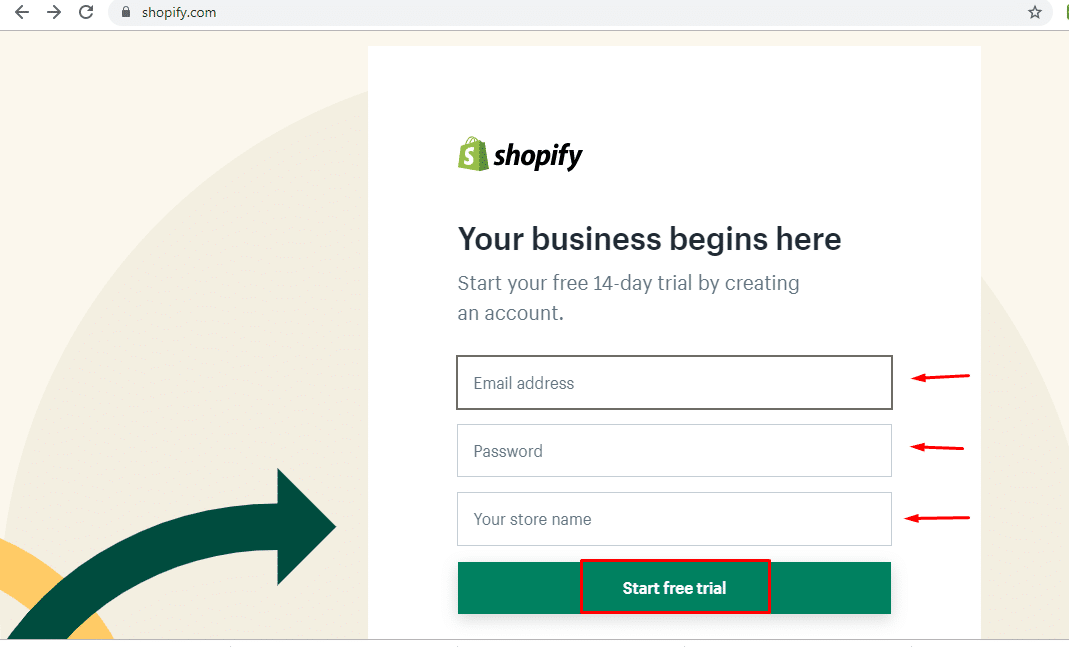
Fill the Desired e-mail, password, and store name. After clicking next, the below screen will appear.
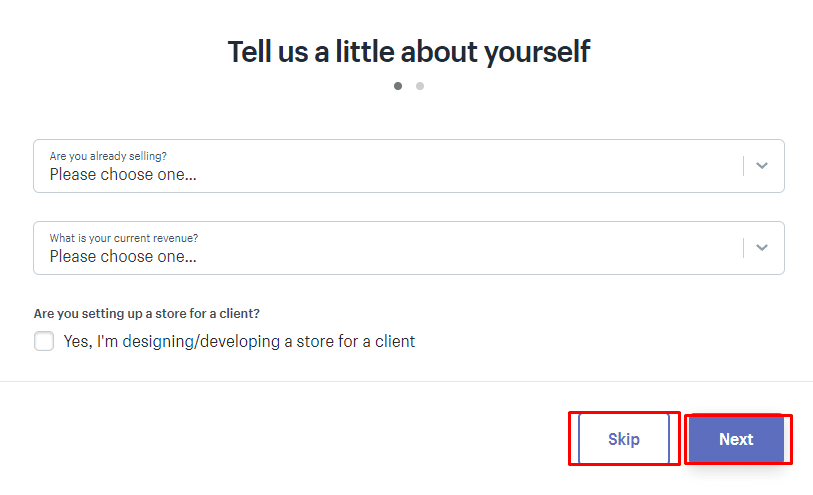
You can either skip it or fill the fields by choosing the option from the drop-down menu.
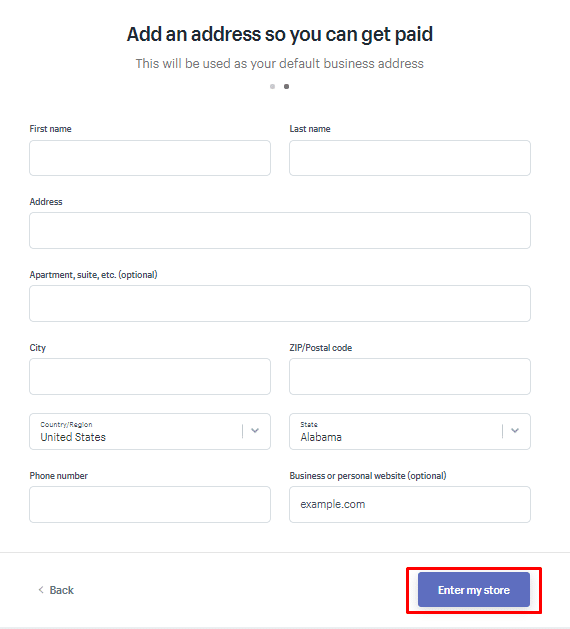
The next page will ask you to fill the information including name, address, contact no., etc as shown. This info is asked to configure tax rates and currencies.
2. Add products to your Shopify Online Shop
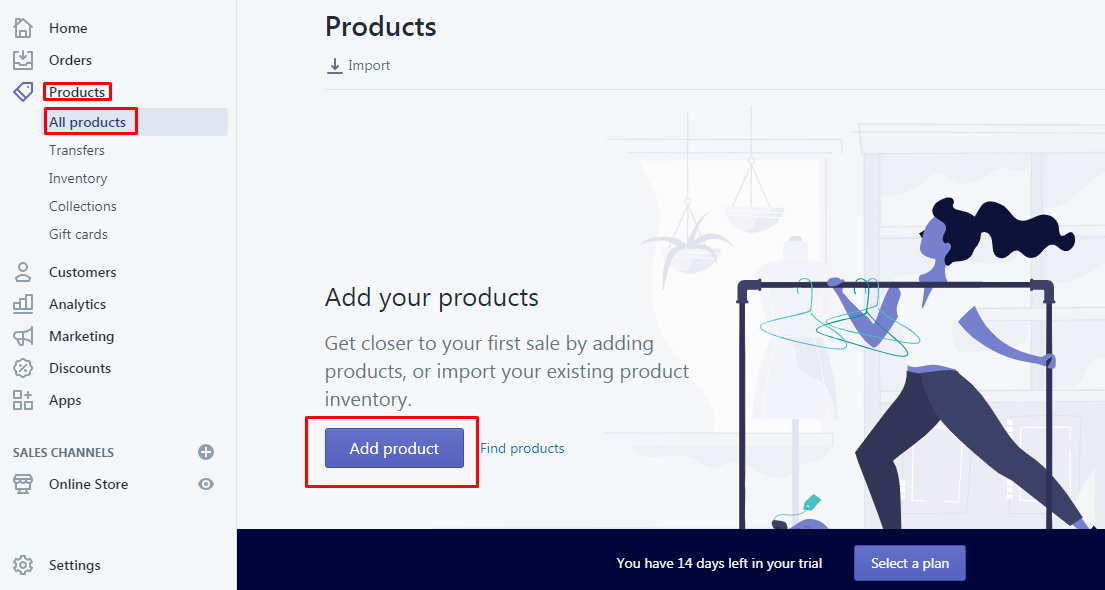
After filling the name, address and contact details and clicking on the ‘Enter my store’ button, you’ll reach your Shopify Dashboard.
Now, we’ll guide you with a complete step by step process to completely set your Shopify shop.
Let’s begin with adding products.
Click on Products from the sidebar menu. Then click on Add Products.
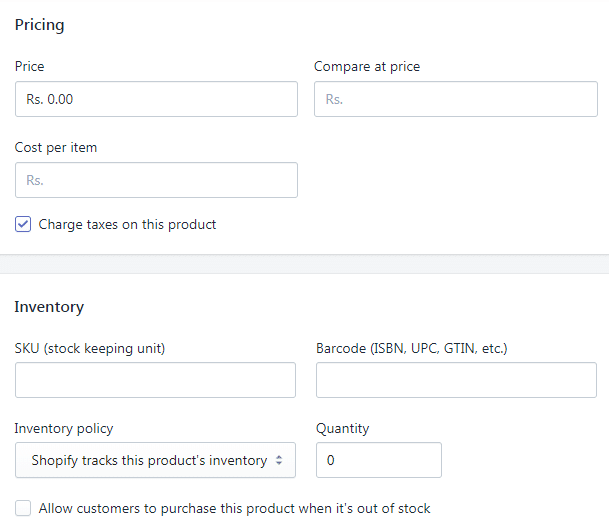
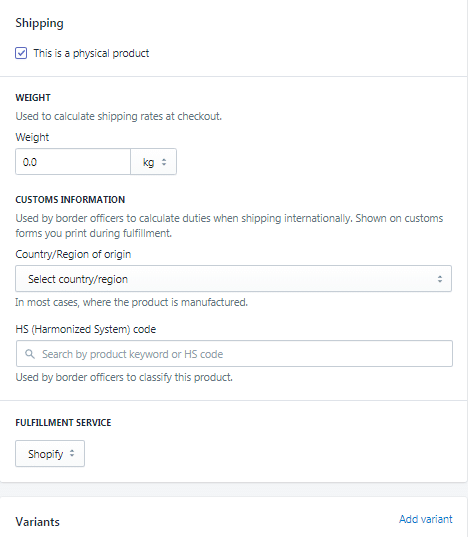
WordPress and Shopify have almost same add product page. Here you can fill the details like title, description, product image(s), pricing, inventory details, shipping information, as displayed below.
Also Read: Magento Vs. Shopify: What Should You Choose?

Step 3: Customize the Look of your Shopify Site.
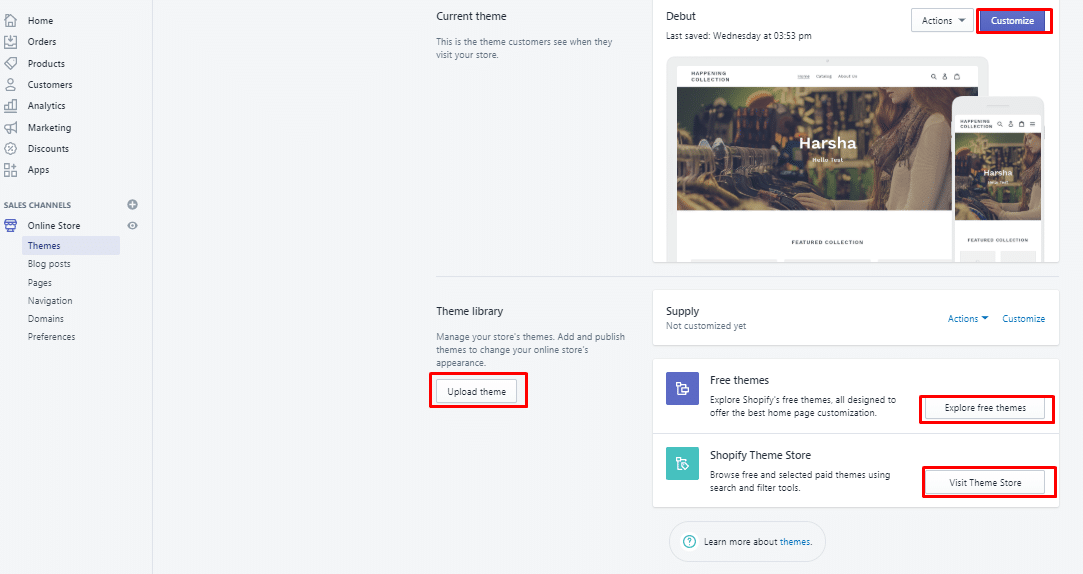
Theme Customization
On the Dashboard. Select Themes. Here you can customize the default theme, explore the free themes, buy the paid themes. All the Shopify themes are customizable. And if you aren’t liking the available themes, you can contact our Shopify Experts for Shopify theme development services. Our team has solid hands-on experience in custom Shopify theme development.
You can customize the theme completely including :
Color settings
Typography settings such as head font, body text font, Social media settings: You can select images to be shared on Social media platforms, Choose social sharing options, upload Social Account URLs: Twitter, Facebook, Pinterest, Instagram, Tumbler, and more.
Favicon: You can upload the favicon image for the branding of the online shop.
Add to Cart Notifications: Tick Mark ‘Show Notifications when the item is added to cart’.
Checkout: You can select the banner background image, logo image, main content area background image, order summary background image, and customize the checkout settings.
Customize Checkout Settings: Here you can choose if you want to prompt your customer to create an account when they check out.
Customer contact
Choose which contact methods your customers can use to check out and receive updates.
Form options
Choose whether your checkout form requires extra information from your customer.
Order processing
Change how your store responds to checkout and order events
Email marketing
Let customers sign up for marketing emails at checkout. Customers who sign up are added to the accepts marketing group.
Checkout language
You can also manage the checkout language.
Settings:
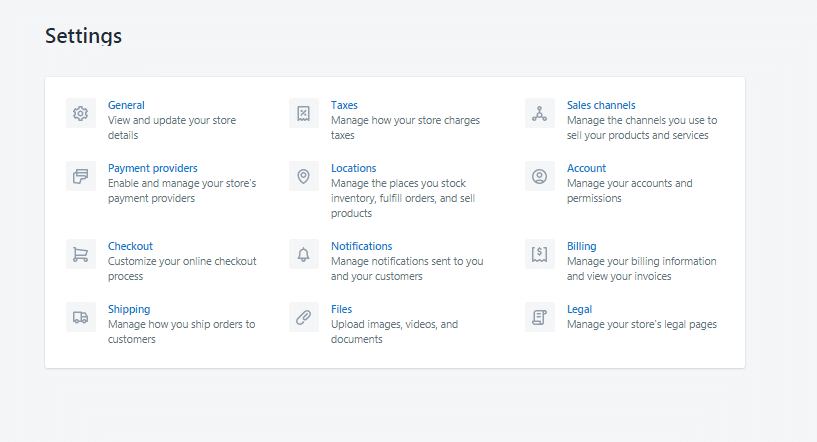
General Settings
Fill your store details including the store’s name, address, Currency, time zone, and more.
Taxes:
Complete the information regarding tax region and tax calculations.
Sales Channels
You can manage and add more sales channels here.
Locations
You can manage the places where you stock inventory, sell products and fulfill orders.
Activate the payment Providers
Click on Settings and select Payment Providers. From here you can activate different payment modes to accept payments and keep those payments in an account. Simply follow the steps to activate different payment processors.
Likewise, you can manage notifications, billing, shipping, files and legal pages from Settings.
Analytics
Click on Analytics from the sidebar.
Dashboard: Here you can see the total sales, online store sessions, returning customer rate, and other business insights.
Reports:
Here you can check the sales, acquisition, marketing, inventory, and other reports.
Live View: You can see the live view status of the users from here.
Apps:
Like Android and iOS Smartphones. Shopify has a pool of smart apps, known as Plugins in WordPress. Based on the business needs and requirements, you can browse and download free as well as paid apps.
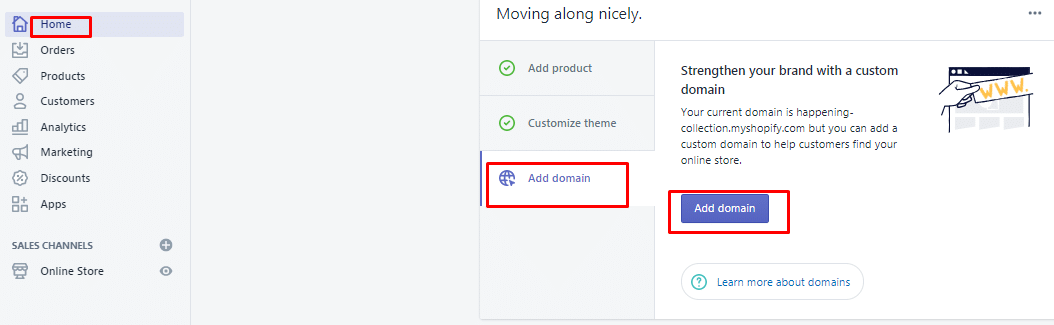
Add a Domain:
Set up your Domain:
Now it’s time to make your site official and live. On the dashboard, click ‘Add to Domains’. Choose the domain you like and follow the steps to finally make the purchase. Also, fill the billing information.
Your Shopify Store is Ready!